

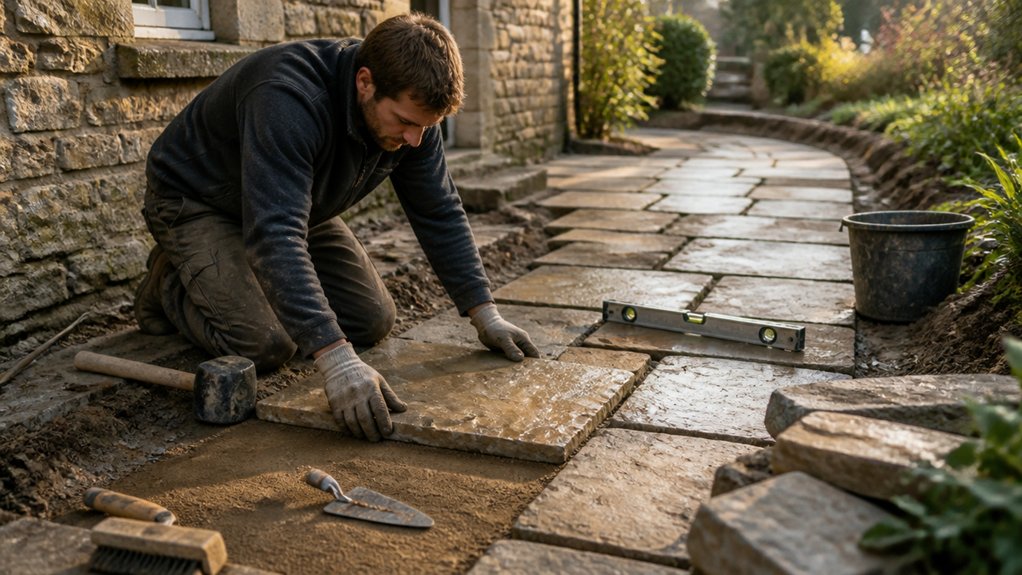
A well-laid York flagstone path should look effortless, but that finish depends on careful preparation beneath every slab. Start by choosing stones with consistent thickness and planning the layout before excavation. You’ll need to establish drainage falls, install a geotextile membrane, and compact a stable crushed-stone base. A firm mortar bed then supports each flagstone and controls its level. The correct method differs slightly indoors, where moisture and floor height demand further attention.
Choose York Flagstones and Plan the Layout

Choose York flagstones with consistent thickness, sound edges, and surfaces free from major cracks or delamination. Confirm each piece suits your intended load, exposure, and finish.
For paths, select durable slabs with manageable dimensions; for patios, prioritize uniformity where furniture will stand; for interior floors, inspect surfaces closely for trip-inducing irregularities.
Consider York stone’s Historical significance when matching an older property, but don’t sacrifice performance for appearance.
Record each slab’s length, width, thickness, color, and distinctive markings during Material selection.
Sort stones into groups by thickness and visual tone, then dry-lay them on a scaled drawing.
Establish a reference line and arrange the largest slabs first, placing prominent markings where they’ll have visual impact.
Rotate neighboring stones to balance joints, and mark every piece and orientation before installation.
This method reduces cutting, waste, and confusion.
Prepare the Ground and Set the Fall
Once you’ve marked each slab and confirmed the layout, transfer the plan to the ground. Remove vegetation, loose soil, and organic matter within the marked area, extending slightly beyond the finished edges. Excavate to a consistent depth that accommodates your flagstone thickness and the specified construction layers, without disturbing firm subsoil. Check levels frequently with a straightedge and spirit level.
Set the fall away from buildings, typically 1:60 to 1:40, so rainwater won’t collect against walls. Establish a high reference point, then drive level pegs and use taut string lines to guide the gradient. Confirm the fall in both directions where the layout requires it.
Your Tool selection should include a spade, mattock, shovel, rake, level, string, and pegs. Consider Weather considerations: work during dry conditions, and cover exposed ground before rain.
Build the Base for Drainage and Stability
With the ground excavated and the fall established, build the base in compacted layers to provide drainage and prevent movement.
Lay a geotextile membrane over the subgrade, overlapping joints by at least 300 mm. This separation layer improves weed prevention, limits soil migration, and helps maintain drainage.
Add well-graded MOT Type 1 or crushed stone in lifts no deeper than 75 mm. Spread each lift evenly, then compact it thoroughly with a vibrating plate compactor, making several passes in different directions.
Check the surface with a straightedge and correct any hollows before adding the next lift.
Continue until the base reaches the required depth, allowing space for the bedding layer and York flagstones.
Confirm the finished base follows the planned fall, remains firm underfoot, and contains no soft spots.
Set York Flagstones on a Mortar Bed
Prepare a consistent mortar bed, then position each York flagstone and check its level and fall.
Press stones into place without rocking them, adjusting the mortar beneath as needed.
Fill and tool the joints neatly to create a stable, weather-resistant surface.
Prepare the Mortar Bed
Mix a full bed of stiff, workable mortar on the prepared base, keeping it thick enough to support the York flagstone without sinking or cracking. Use a consistent depth, typically 30–50 mm, and spread only enough mortar for immediate coverage.
Choose a mix compatible with the substrate and stone; excessive cement can restrict movement and encourage cracking. Dampen the base lightly, but remove standing water before placing mortar.
Compact the bed thoroughly with a trowel to eliminate voids, especially along edges and beneath likely load areas. Keep the surface slightly higher than final grade to allow compression.
Protect freshly mixed mortar from drying wind, frost, and rain. Historical significance doesn’t replace sound construction.
Follow maintenance tips: clean tools promptly and discard mortar that has begun to stiffen.
Position and Level Stones
Once the mortar bed is compacted, set each York flagstone into place while the mortar remains workable. Follow your planned flagstone patterns, positioning the largest stones first and maintaining the intended orientation.
Press each slab firmly with a rubber mallet, using controlled taps to achieve full, even contact without cracking the stone. Check the surface with a straightedge and spirit level in both directions.
Add or remove mortar beneath high or low areas, then reset the slab until it matches the required fall for drainage. Keep adjacent faces aligned and maintain consistent spacing according to your design.
Install decorative borders carefully, checking their line against string guides or layout marks.
Work progressively across the area, and avoid walking on newly positioned stones while the mortar settles.
Fill and Tool Joints
After the mortar has firmed enough to support the slabs, fill the joints with a suitable mortar or pointing compound, pressing it fully into each gap to eliminate voids. Work methodically from one edge across the surface, and keep the mix off the flagstone faces as much as possible.
Compact each joint with a pointing iron or narrow tuck pointer, then strike it to a consistent profile. Slightly recessed joints generally shed water and frame the York stone neatly, while flush joints suit interior floors.
Don’t overwork the material, or you’ll draw cement paste to the surface. Remove smears with a damp sponge before they harden, rinsing frequently.
Complete joint sealing only after the mortar has cured fully. For aesthetic finishing, brush away loose residue and inspect every joint for cracks, gaps, or uneven tooling.
Point the Joints and Finish the Surface
With the flags firmly bedded and the mortar cured, brush the joints clean and dampen them lightly before pointing.
Pack fresh pointing mortar firmly into each joint with a narrow trowel, working from the bottom upward to eliminate voids.
Strike the joints flush, slightly recessed, or weathered, according to your drainage and appearance requirements.
Keep mortar off the Yorkstone face, and remove smears immediately with a damp sponge; don’t wash mortar into the joints.
Protect the work from rain, frost, and rapid drying while it cures.
Once set, sweep away residue and inspect every joint for cracks or pinholes.
Complete joint sealing only with a breathable, compatible product after the mortar has fully cured.
Avoid aggressive Surface polishing, which can alter the stone’s texture and create slippery areas.
Install York Flagstones on Interior Floors
For interior floors, install York flagstones over a sound, level substrate that’s dry, clean, and strong enough to support the stone and bedding layer. Confirm finished floor height before setting thresholds, doors, and adjoining surfaces.
Apply a compatible flexible adhesive or mortar bed according to the manufacturer’s specifications, then place each flagstone firmly, maintaining planned joints and checking levels continuously. Back-butter thick or uneven pieces to eliminate voids and improve support.
Allow the bedding to cure fully before pointing joints with an appropriate grout or lime-based mortar. Seal only after the surface has dried and the product suits the stone’s porosity.
York stone’s Historical significance rewards careful detailing, but practical Maintenance tips matter: sweep regularly, mop with pH-neutral cleaner, remove spills promptly, and avoid acidic products that can etch the surface.
Conclusion
With careful planning and patient workmanship, you can turn York flagstones into a surface built to last. Choose sound stones, prepare a compacted, free-draining base, and maintain the correct fall from the outset. Set each slab firmly on a stiff mortar bed, then point the joints neatly and allow everything to cure. Treat interior floors with equal precision. Follow these steps, and your finished surface will stand firm like bedrock while adding enduring character to every step.