

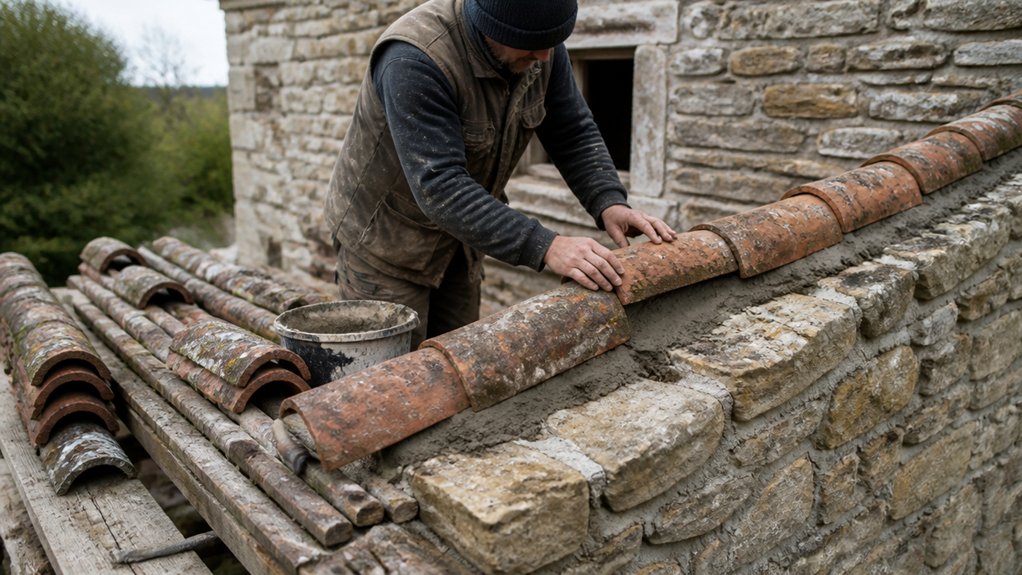
When you repair an older roof, start by checking the existing ridge tiles, measuring their profile, length, and fixing method. You’ll need reclaimed tiles that match the original form, dimensions, and weathering, rather than merely looking similar. Source them from reputable salvage yards or specialist suppliers, and request photographs and condition details before buying. Once selected, inspect, clean, dry-fit, and secure them with compatible lime mortar or suitable fixings—but the correct preparation often determines whether the finished ridge remains watertight.
Check the Ridge and Measure What You Need
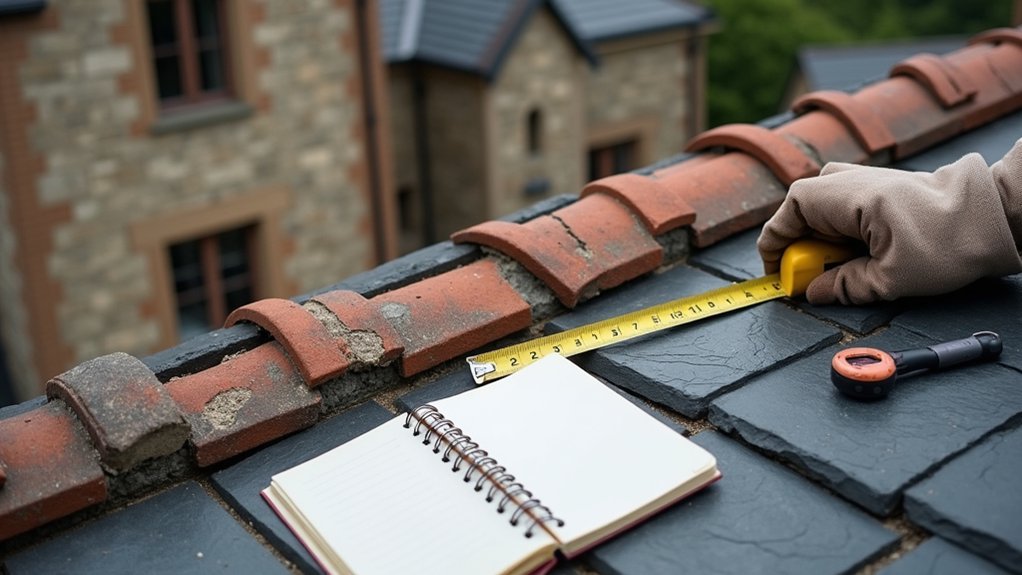
Before you source reclaimed ridge tiles, inspect the roof ridge for its profile, length, pitch, and fixing method.
Work from safe access, using a scaffold or properly secured roof ladder; don’t rely on loose slates.
Measure the ridge run from end to end, then record each junction, hip, gable, and terminal requirement separately.
Allow for cutting, breakage, and historically appropriate replacement pieces, but don’t order until you’ve confirmed the existing bedding depth and mortar condition.
Check whether the ridge is dry-fixed, mechanically fixed, or traditionally bedded, because the installation method affects quantities and preparation.
Examine underlay laps, batten lines, and roof ventilation provisions before disturbing coverings.
Photograph details and note any conservation constraints.
Plan weatherproofing techniques that protect the building’s character while keeping water out.
Match the Reclaimed Ridge Tile Profile and Size
Once you’ve recorded the ridge’s dimensions and fixing method, match the replacement tiles to the existing profile, not just their colour or age. Measure the tile’s length, width, thickness, lap, and curvature, then compare its nose, socket, and fixing holes with the original pattern. A close profile ensures each unit beds correctly and keeps the ridge line straight, reducing gaps where wind-driven rain could enter.
Check whether the roof uses half-round, angle, or ornamental ridge tiles, as these shapes aren’t interchangeable without visible and functional compromises. Preserve the property’s Vintage charm by matching the period-appropriate form and scale, while prioritising Material durability in areas exposed to frost and prevailing weather.
Confirm that the selected dimensions suit the existing underlay, mortar bed, and mechanical fixing system before installation.
Source and Inspect Reclaimed Ridge Tiles
When sourcing reclaimed ridge tiles, buy from reputable salvage yards, specialist roofers, or architectural reclamation suppliers that can identify the tile’s origin, profile, and approximate age. Request clear photographs, dimensions, and details of previous exposure before purchasing.
Compare the batch with your existing ridge tiles, checking length, width, curvature, nibs, and fixing-hole positions for consistency. Inspect every tile in natural light. Reject pieces with deep cracks, excessive delamination, severe edge loss, distorted profiles, or friable surfaces that won’t withstand handling.
Minor staining, lichen traces, and colour variation can suit an older roof and support authentic Historical building restoration. Tap each tile lightly; a dull, broken response may indicate internal weakness.
Record quantities, defects, and spare pieces to inform future roof tile maintenance without altering the heritage character.
Prepare and Fix the Ridge Tiles Securely
After sorting the reclaimed ridge tiles, clean off loose dirt and old mortar with a stiff nylon brush, taking care not to abrade the fired surface or remove sound patina.
Dry-fit each tile along the ridge, checking that its profile, colour, and overlap suit neighbouring pieces. Replace cracked units, or reserve them for decorative alternatives away from exposed ridge lines.
Brush dust from the bedding area and lightly dampen porous tiles before fixing. Use a compatible lime mortar, not a hard cement mix that can trap moisture and damage historic masonry.
Bed each tile evenly, maintain consistent laps, and tool joints neatly without smearing the surface. Modern installation techniques, including discreet mechanical clips or stainless-steel fixings, can improve wind resistance where appropriate.
Follow local conservation guidance, then allow mortar to cure gradually, protected from frost and heavy rain.
Conclusion
By checking the ridge first, measuring accurately, and matching the reclaimed tiles’ profile, dimensions, and exposure, you’ll protect both the roof and the building’s character. Inspect every tile, reject defects, and dry-fit the run before fixing it with compatible lime mortar or suitable mechanical support. As the saying goes, “measure twice, cut once.” Keep laps, joints, and weatherproofing consistent, then protect the work while it cures. Done carefully, your repair should remain sound and heritage-appropriate.